Tool Material Matrix
When milling dense hardwoods like oak, maple, or walnut, choosing the right tool material determines whether you get a flawless finish or a ruined workpiece. As a dedicated CNC wood routers manufacturer and supplier, we test these tools daily. The choice boils down to two main materials: solid carbide and high-speed steel (HSS).
Solid Carbide: The Gold Standard for Hardwood
For serious hardwood machining, solid carbide spiral bits are the absolute industry standard. Hardwood is highly abrasive and packed with dense fibers that quickly dull weaker metals. Solid carbide is incredibly rigid and holds a sharp cutting edge up to four times longer than steel. This rigidity minimizes bit deflection, ensures exceptional surface finish quality, and handles the high heat generated during deep profile cuts.
High-Speed Steel (HSS)
High-speed steel bits are sharper out of the box and cost less upfront than carbide. However, HSS loses its temper and dulls rapidly when subjected to the intense friction and heat dissipation issues common in dense woods. While HSS works well for softwoods or short DIY runs, it wears down too quickly on hard, gummy woods, leading to edge burning and grain tear-out.
The Verdict
| Feature | Solid Carbide Bits | High-Speed Steel (HSS) Bits |
|---|---|---|
| Tool Life | Extreme (Lasts 3-4x longer) | Short (Dulls quickly in hardwood) |
| Heat Resistance | Excellent (Maintains hardness) | Poor (Softens under high heat) |
| Cut Quality | Consistently Clean | Clean initially, degrades rapidly |
| Best Used For | Production runs, dense hardwoods | Softwoods, light hobby work |
Our Recommendation: Always invest in solid carbide for hardwood processing. The extended tool life and superior edge retention easily offset the higher initial cost by reducing machine downtime and material waste.
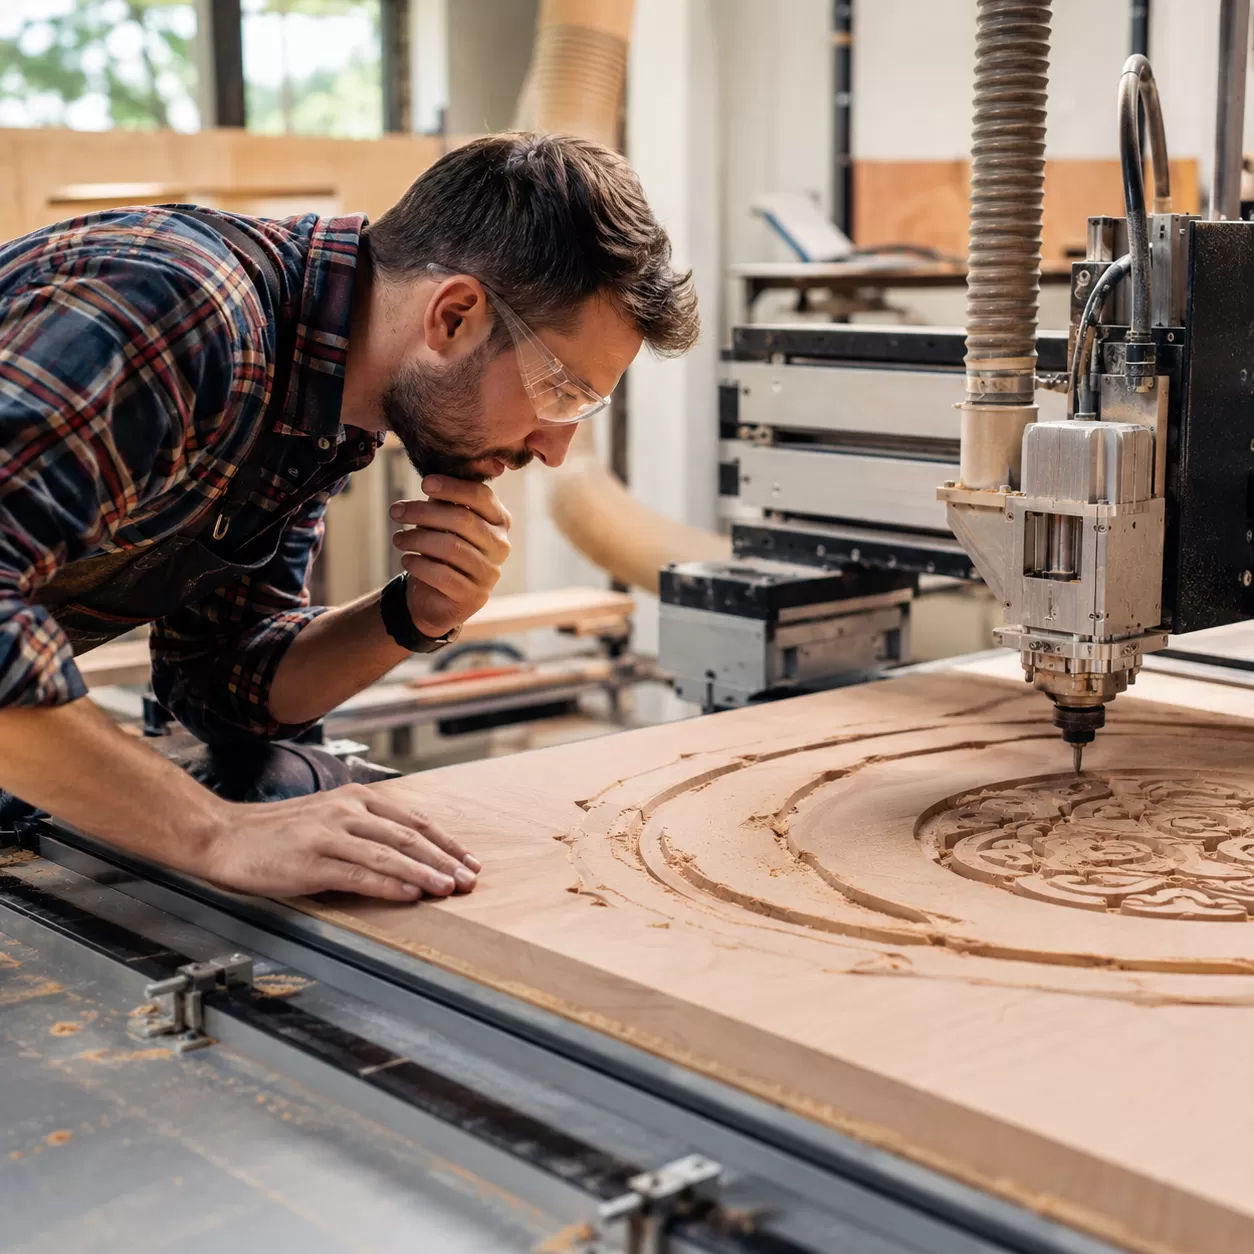
Decoding Flute Geometries for Hardwood Extraction
Choosing the right flute geometry is the most critical decision when figuring out what CNC router bits for hard woods will deliver the cleanest edge. The way a bit is grooved dictates how chips are cleared and how the wood fibers are sheared.
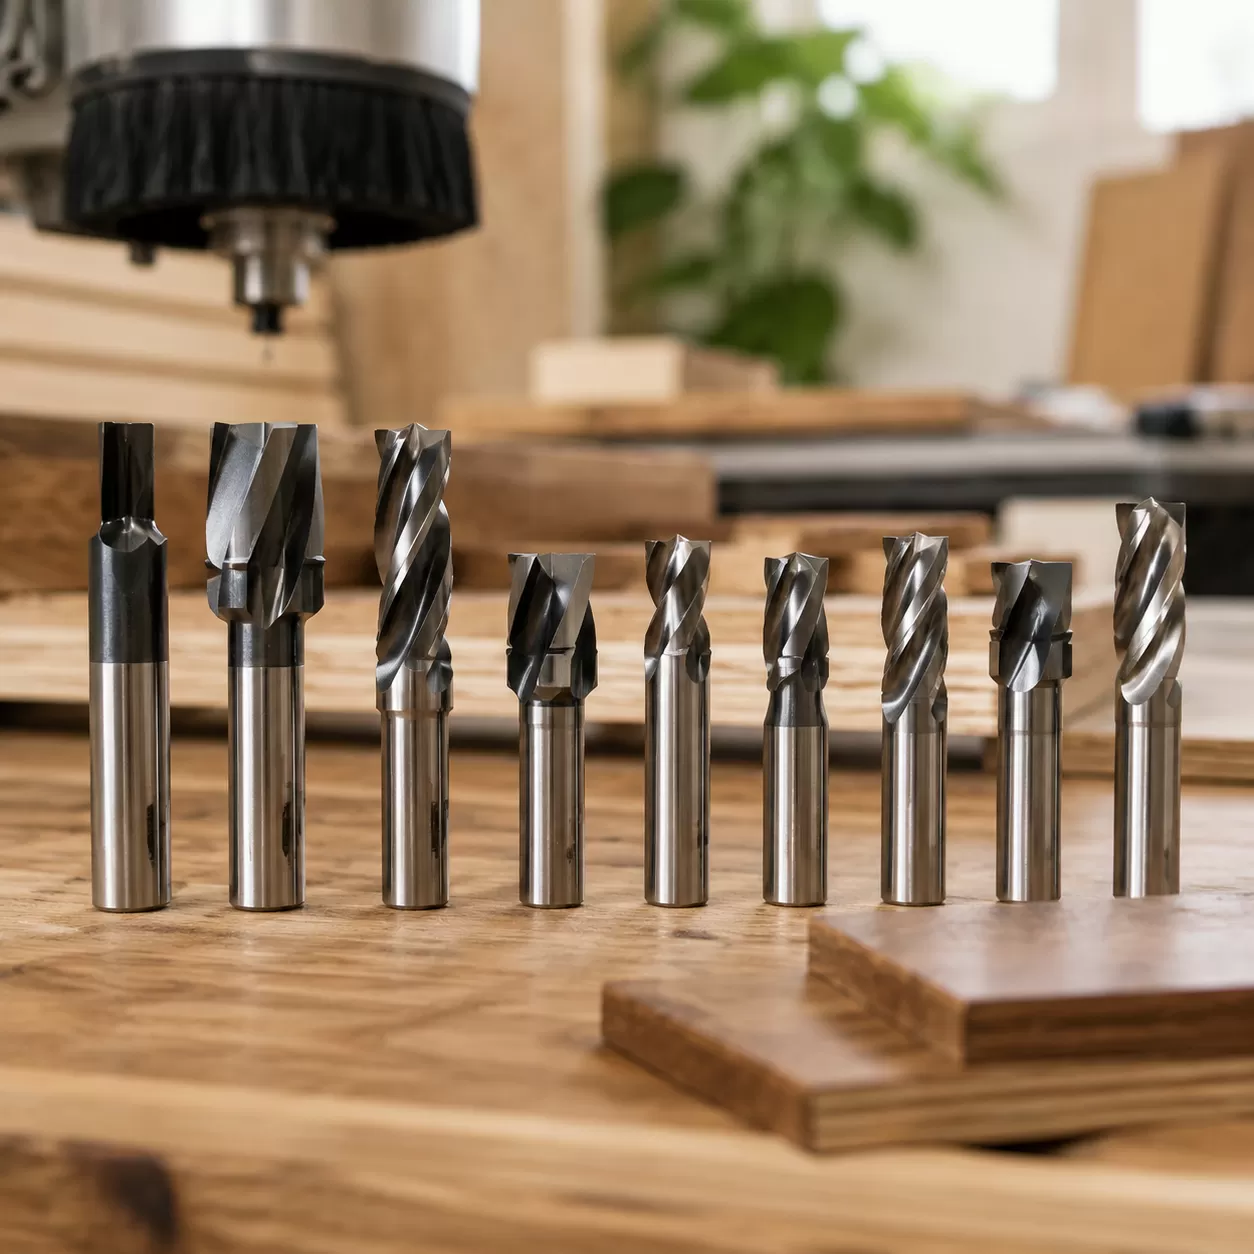
A. Two-Flute vs. Single/Multi-Flute
For dense hardwoods like oak, maple, and walnut, a two-flute up-cut endmill strikes the perfect balance. Single-flute bits don't offer enough structural strength for hard woods and can deflect, while three or four-flute bits clear chips too slowly, leading to friction and immediate wood burning. Two flutes provide the ideal chip valley to lift heavy hardwood debris out of the cut at optimal feed rates.
B. Up-Cut Spiral Plunge Bits
An up-cut spiral plunge bit pulls wood chips upward and out of the cut, much like a standard drill bit.
- Best For: Deep pocketing, heavy material removal, and slotting.
- The Catch: Because it pulls upward, it can cause minor splintering or tear-out on the top surface of your hardwood workpiece.
- Pro Tip: Use this when top surface finish isn't the priority, or when processing deep profile cuts where chip clogging is a risk.
C. Down-Cut Spiral Plunge Bit
A down-cut spiral plunge bit does the exact opposite—it pushes the chips downward toward the machine bed.
- Best For: Creating a flawlessly clean top edge on veneers and shallow dados.
- The Catch: Pushing chips down means they pack tightly into the cut. If used for deep channels, the trapped friction will burn the wood and ruin the tool.
- Pro Tip: Limit down-cut bits to shallow passes or final perimeter skin cuts.
D. Compression Cutters (The Ultimate Hybrid)
Compression cutters combine the best of both worlds. The bottom portion of the bit pulls chips up, while the top portion pushes chips down, compressing the wood fibers toward the center of the material.
- Best For: Full-thickness profile cuts on hardwood-faced plywood or solid lumber.
- The Result: Completely eliminates tear-out on both the top and bottom faces of the board in a single pass.
E. Double-Flute Straight Bits
Before spiral bits took over, the double-flute straight bit was the industry standard.
- Characteristics: These bits feature straight, vertical cutting edges rather than a helix.
- Best For: Simple, cost-effective edge trimming and shallow routing.
- Performance: They lack the smooth shearing action of spiral options, meaning they hit the hardwood face harder and wear out faster, but they remain an excellent budget option for straightforward profiling.
| Flute Type | Chip Direction | Top Edge Quality | Bottom Edge Quality | Best Application |
|---|---|---|---|---|
| Up-Cut Spiral | Upward | Prone to tear-out | Perfect | Deep pockets & slotting |
| Down-Cut Spiral | Downward | Perfect | Prone to tear-out | Shallow dados & veneers |
| Compression | Center-facing | Perfect | Perfect | Full-thickness profiling |
| Straight Flute | Neutral | Fair | Fair | Budget edge trimming |
If your machine components are wearing down from heavy hardwood production, maintaining your setup with quality CNC spare parts will ensure your spindle and collets hold these high-performance geometries perfectly rigid during intense cuts.
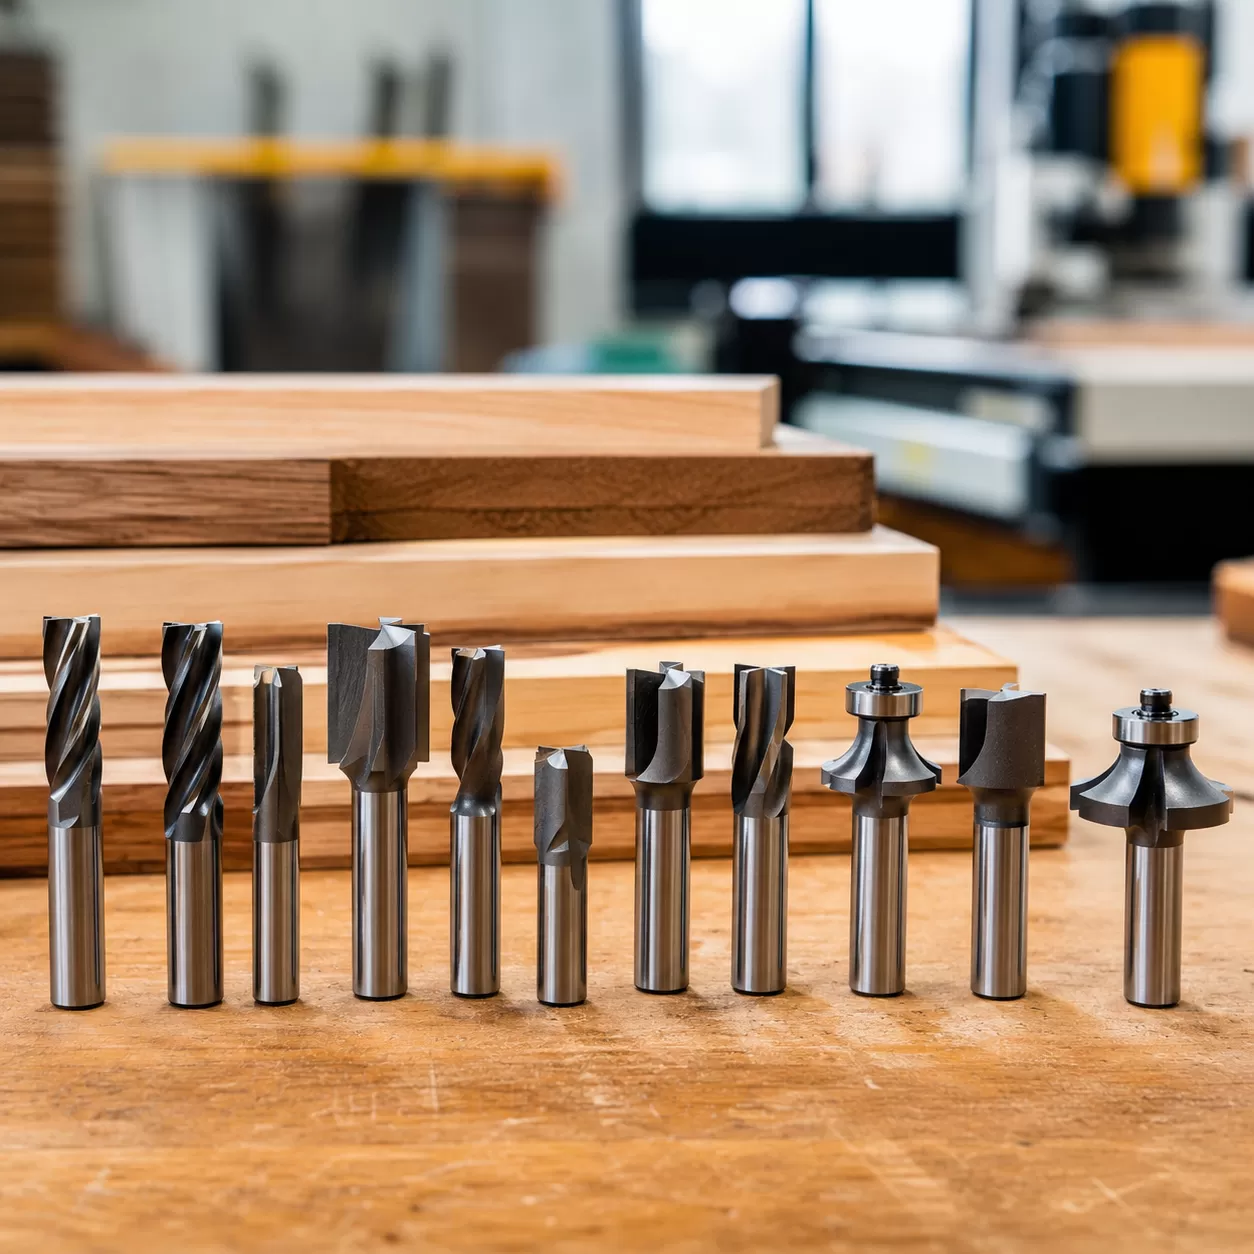
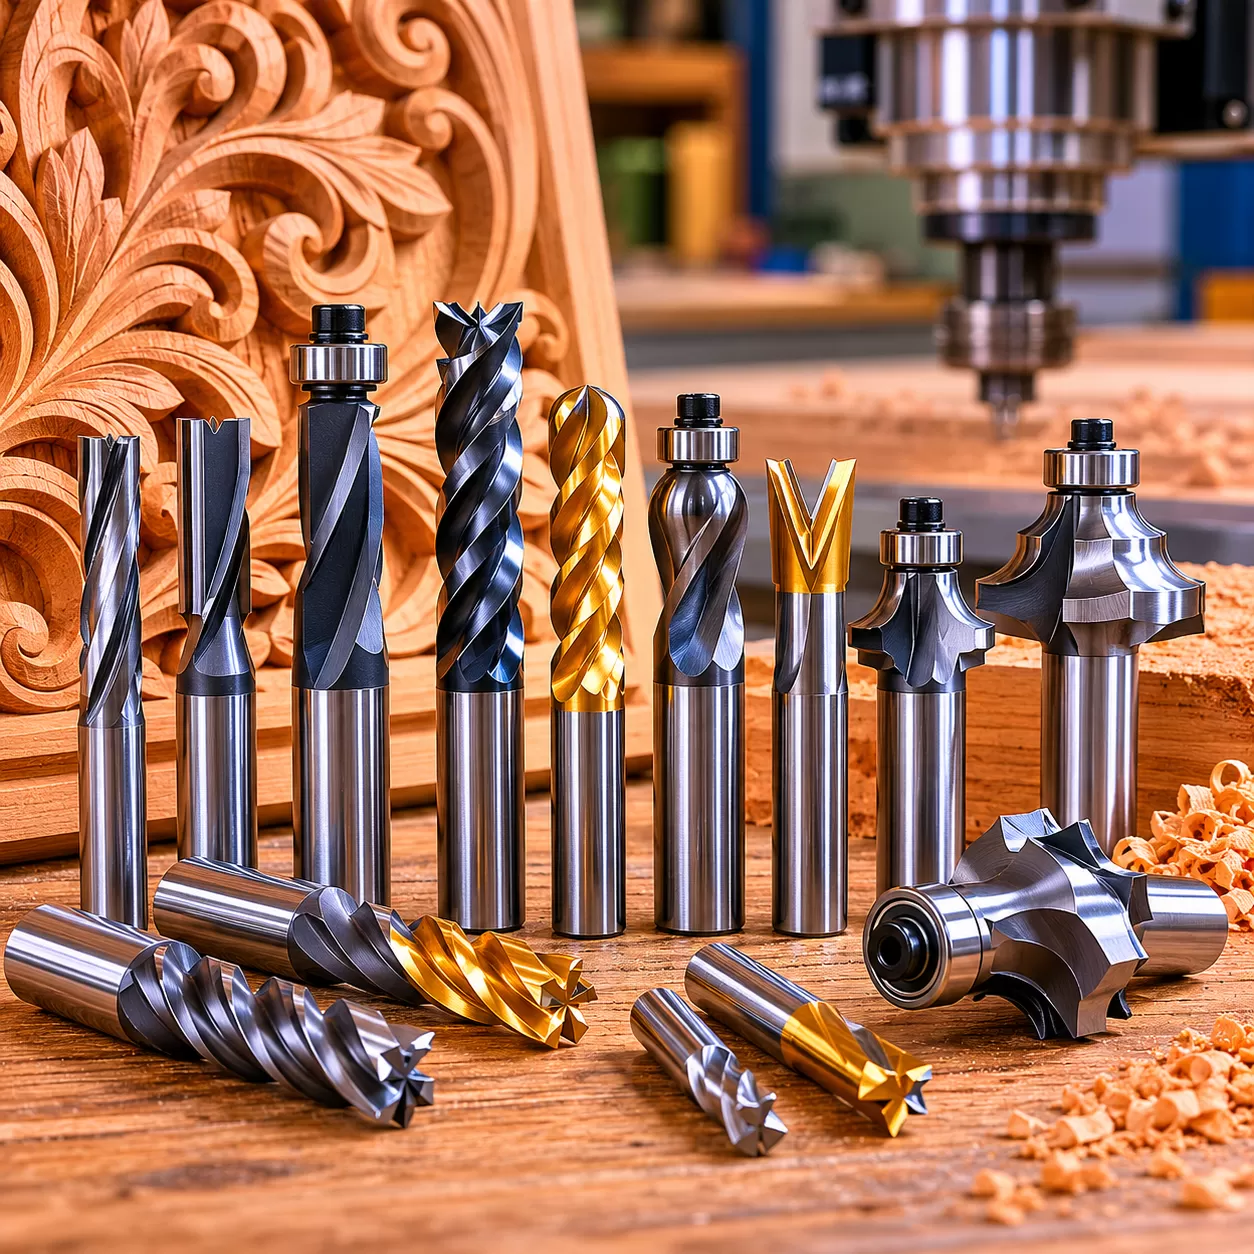
Specialized Bits for Hardwood Processing
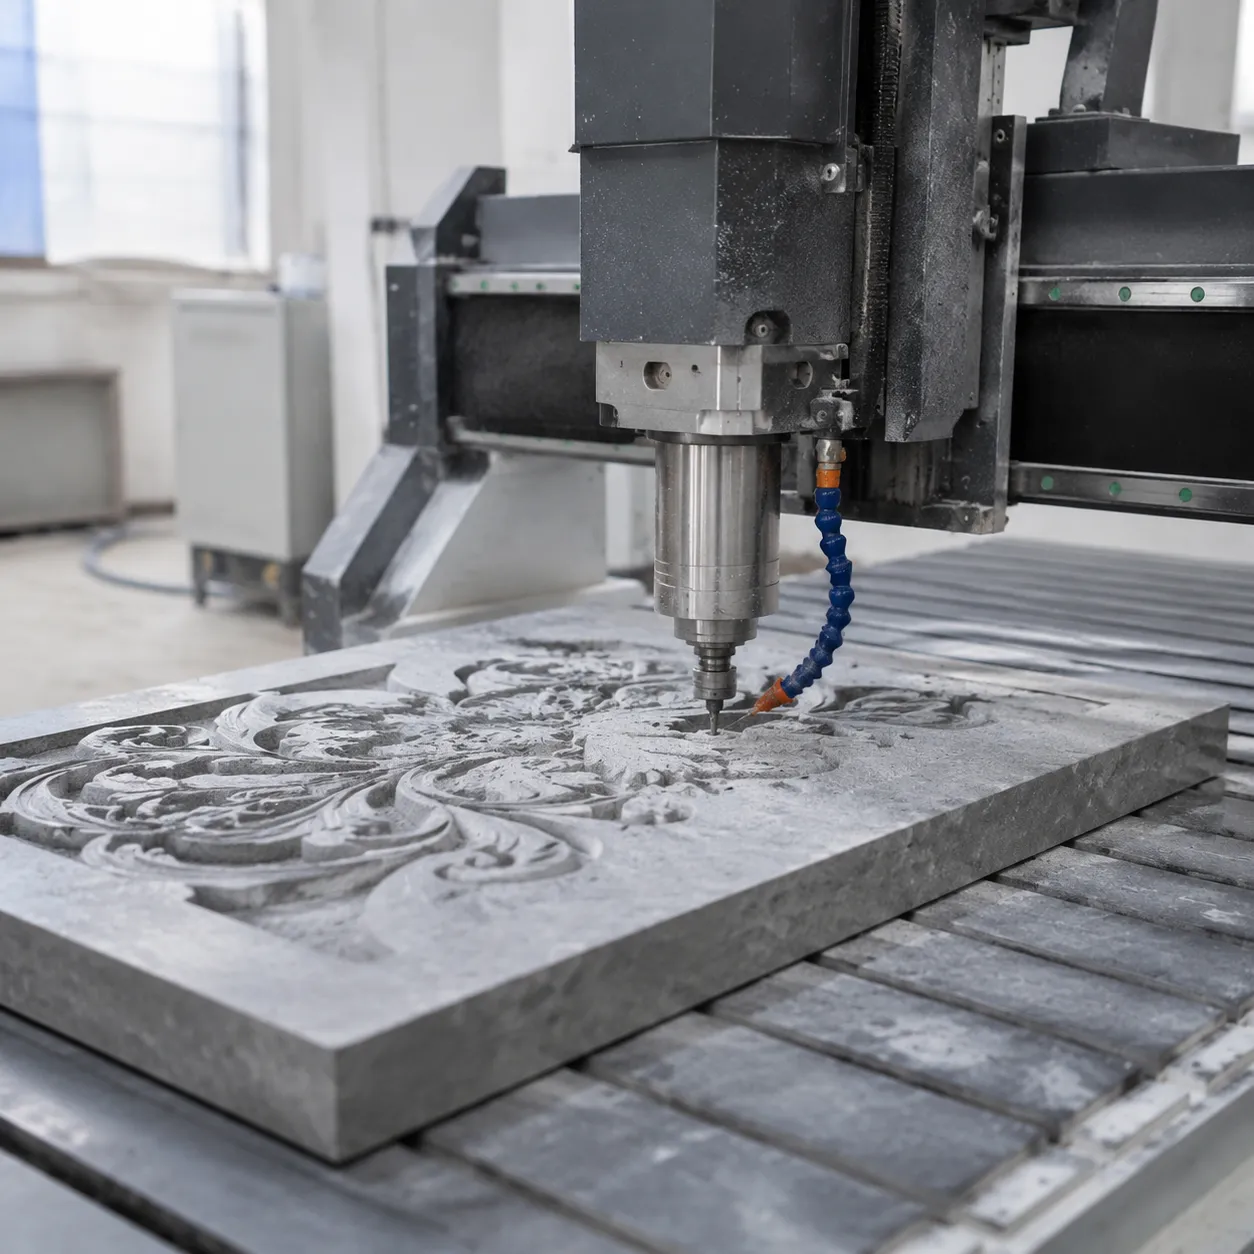
When deep profile cuts or intricate 3D carvings are on the menu, standard bits won't always cut it. Dense species like oak, walnut, and maple require specialized geometries to clear chips efficiently and maintain a flawless surface finish quality. As a dedicated manufacturer of heavy-duty industrial machinery, including advanced CNC wood lathe systems, we know exactly how tooling choice impacts your final product.
Roughing Endmills (Corn Cob Bits)
For heavy material removal, a standard bit can struggle with heat dissipation in dense woods. That is where the roughing endmill, often called a "corn cob" bit, comes into play.
- Scalloped Edge Design: The broken cutting edges break up the wood fibers into tiny, manageable chips rather than long strands.
- Reduced Load: It significantly lowers the cutting force and machine chatter, protecting your spindle.
- The Workflow: Use a roughing endmill to hog out the bulk of the hardwood rapidly, leaving a small offset for a clean finishing pass with a standard solid carbide spiral bit.
Ball Nose & V-Bits
For detailed 3D profiling, signing, and chamfering, you need specialized tips designed for precision.
- Ball Nose Bits: Ideal for 3D contours and smooth, curved surfaces. The rounded tip eliminates sharp internal corners, giving you a smooth surface finish quality directly off the machine.
- V-Bits (V-Groove): The go-to choice for crisp lettering, sharp corners, and intricate carving. They excel at engraving deep, dramatic lines without splintering the hardwood face.
Using the right specialized tooling ensures your CNC router runs efficiently, prevents edge burning, and extends the lifespan of your machine components.
Feeds, Speeds, and Chip Loads
Combating the #1 Enemy: Heat
When routing dense hardwoods like oak, maple, or walnut, heat is your absolute enemy. Unlike metal, wood doesn't dissipate heat through the chips; instead, the friction builds up right on the cutting edge of your solid carbide spiral bits. If your feed rate is too slow, the bit rubs against the wood rather than cutting it, leading to burnt edges, smoke, and rapidly dulled tooling. As a long-time manufacturer of heavy-duty CNC milling machines, we always emphasize that maintaining a proper feed rate is the only way to force the heat out with the wood chips.
Calculating the Sweet Spot
To achieve flawless surface finish quality and prevent tool breakage, you must target the correct chip load calculation. Chip load is the actual thickness of the wood chip cut by each flute per revolution. You can calculate your target CNC wood router parameters using this standard formula:
$$\text{Chip Load} = \frac{\text{Feed Rate (inches or mm per minute)}}{\text{RPM} \times \text{Number of Flutes}}$$
For dense hardwoods, use these baseline configurations to find your sweet spot:
| Bit Diameter | Target Chip Load (Hardwood) | Recommended Flute Count |
|---|---|---|
| 1/8" (3.175mm) | 0.003" - 0.005" | Two-flute up-cut endmill |
| 1/4" (6.35mm) | 0.009" - 0.011" | Two-flute or compression cutters |
| 1/2" (12.7mm) | 0.016" - 0.018" | Two-flute or roughing endmill |
Adjust your spindle RPM and travel speed together. If you notice fine wood dust instead of distinct, clean wood flakes, immediately increase your feed rate or lower your spindle speed.
Climb Milling vs. Conventional Milling in Hardwoods
The direction your bit engages the wood grain drastically impacts your final edge. Choosing the right milling direction is a key element of tear-out prevention:
- Climb Milling: The bit rotates with the direction of the feed. This creates a chip that starts thick and thins out, yielding an exceptionally clean surface finish and reduced fuzzing. It is highly effective for final passes on rigid CNC setups.
- Conventional Milling: The bit rotates against the feed direction. The chip starts thin and thickens. While it places less sudden shock on lighter machines, it can pull at unstable wood grains, increasing the risk of splintering on the top veneer.
For the best results on dense grains, run a roughing pass using conventional milling, leaving about 0.02 inches of material, and follow up with a final full-depth finish pass using climb milling.
Troubleshooting Common Hardwood CNC Issues
Working with dense hardwoods like oak, walnut, or maple on a CNC router delivers stunning results, but it also pushes your tooling and machine to their limits. When things go wrong, it usually comes down to a mismatch between your flute geometry, chip load, or material density. Here is how to diagnose and fix the three most common hardwood machining problems instantly.
Problem: Edge Burning and Smoke
Seeing smoke or charred edges is a clear sign that your bit is rubbing against the wood rather than cutting it. This friction generates extreme heat, which ruins the wood surface and quickly destroys the temper of your solid carbide or high-speed steel (HSS) bits.
- The Cause: Your feed rate is too slow, or your spindle speed (RPM) is too high. This creates an incredibly small chip size, turning the wood into fine dust that traps heat.
- The Fix: * Increase the feed rate: Move the machine faster through the material so the bit takes larger bites.
- Lower the spindle RPM: Decrease the rotation speed to balance the chip load calculation.
- Check for resin buildup: Pitch and resin can bake onto a two-flute up-cut endmill or double-flute straight bit. Clean the bit with a dedicated bit cleaner.
- Replace dull bits: A worn-out edge loses its shearing ability and resorts to friction friction-cutting.
Problem: Tear-Out or Splintering on the Top Veneer or Grain
Tear-out happens when the upward force of the router bit lifts and fractures the wood fibers along the grain before it can cleanly shear them off.
- The Cause: Using the wrong flute geometry for the specific depth of your cut, particularly using an up-cut spiral plunge bit on the topmost surface of a delicate grain.
- The Fix:
- Switch to a down-cut spiral plunge bit: A down-cut bit forces the wood fibers downward during the cut, leaving a flawless top surface finish quality.
- Use compression cutters: For hardwood blanks or veneered plywood, a compression bit features an up-cut bottom and a down-cut top, sandwiching the wood fibers together to eliminate tear-out on both sides.
- Change the toolpath direction: Switch between climb milling and conventional milling. Hardwoods often respond better to climb milling on the final pass to prevent splintering.
- Apply a scoring pass: Program a shallow first pass (around 0.5mm deep) at a slower feed rate to pre-slice the grain.
Problem: Excessive Machine Chatter or Bit Deflection
Machine chatter shows up as ugly ridges or "waves" on the cut edge, accompanied by a harsh, vibrating noise from the gantry. Bit deflection means the forces are physically bending the router bit, leading to inaccurate dimensions.
- The Cause: Pushing the tool too hard, using a bit that is too long, or running a machine that lacks rigidity.
- The Fix:
- Reduce the Depth of Cut (DOC): Do not exceed a depth equal to the diameter of your bit per pass when cutting dense woods. If you are using a 6mm bit, cut in 3mm or 4mm layers.
- Use a larger shank diameter: Swap a 1/4-inch bit for a 1/2-inch solid carbide bit. The thicker core dramatically increases rigidity.
- Use a roughing endmill: For deep profile cuts, use a "corn cob" roughing endmill to break up the chips and relieve cutting pressure before running a finishing pass with a standard two-flute bit.
- Shorten the stick-out: Ensure the bit is seated as deeply into the collet as safely possible to minimize leverage and flexing.
FAQs About What CNC Router Bits for Hard Woods
What is the best bit diameter for cutting dense oak or walnut?
For heavy material removal in dense hardwoods like oak or walnut, a 1/4-inch or 1/2-inch diameter bit is the ideal choice. Larger diameters provide the structural rigidity needed to prevent bit deflection and handle the resistance of tight grain patterns. If your project involves intricate details or tight inside corners, switch to a 1/8-inch or smaller bit specifically for the detail passes after clearing the bulk material with a larger tool. As a manufacturer of industrial CNC wood routers, we design our spindles to handle these larger diameter solid carbide bits efficiently without losing steps.
How many flutes do I need for hardwood milling?
A two-flute configuration is the sweet spot for hardwood milling. It provides the perfect balance between chip clearance space and edge finish quality. While a single-flute bit clears chips fast, it can cause vibration in dense woods. Conversely, three or four-flute bits have smaller valleys between the cutting edges, which traps wood dust, causes friction, and burns the wood. Stick to two flutes to keep your chip load optimized and your cuts clean.
Can I use a down-cut bit for deep profile cuts in hardwood?
No, using a down-cut bit for deep profile cuts or deep pockets in hardwood is highly discouraged. Down-cut spiral plunge bits push chips downward into the cut line. In a deep groove, those chips have nowhere to escape, leading to immediate heat buildup, packing, and potential bit breakage. Save down-cut bits for shallow dados or the top layer of laminate veneers. For deep profile cuts, always use an up-cut spiral bit or a compression cutter to ensure proper chip evacuation.
How do I stop my wood from burning on the CNC machine?
Wood burning is caused by friction when the router bit rubs against the material instead of cutting it. To eliminate burning on your CNC machine, implement these adjustments:
- Increase the feed rate: Move the gantry faster so the bit spends less time rubbing against a single spot.
- Lower the spindle RPM: Drop your dial speed to reduce the frictional heat generated per second.
- Check for dull tools: Replace worn bits with high-quality solid carbide cutters that cleanly shear the hardwood fibers.
- Blow away the dust: Use a strong dust collection system or air assist to prevent recutting old chips.